6. ViCANdroid
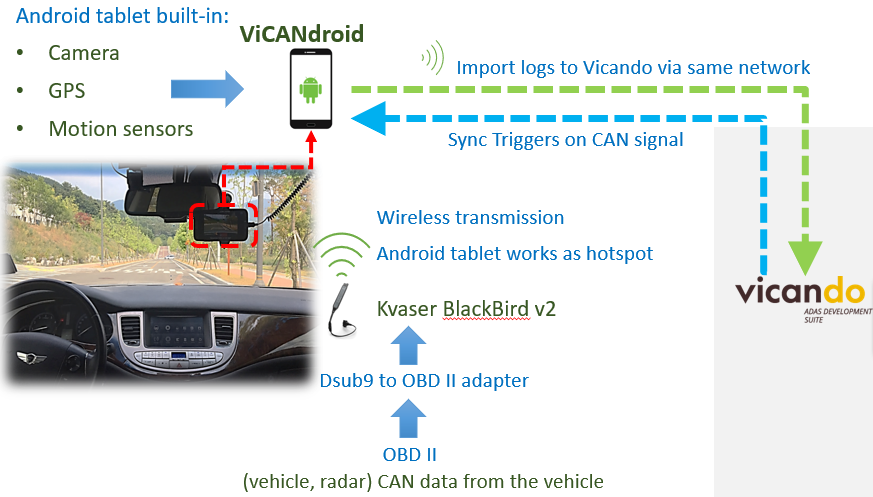
ViCANdroid is an advanced Android based multimedia logger and can log CAN traffic in up to 4 channels with a single Android device as the logger.
It uses all the built-in sensors from the Android tablet/phone to minimize the cost of loggers.
This is the best option for applications that don’t need to log that many different kinds of data.
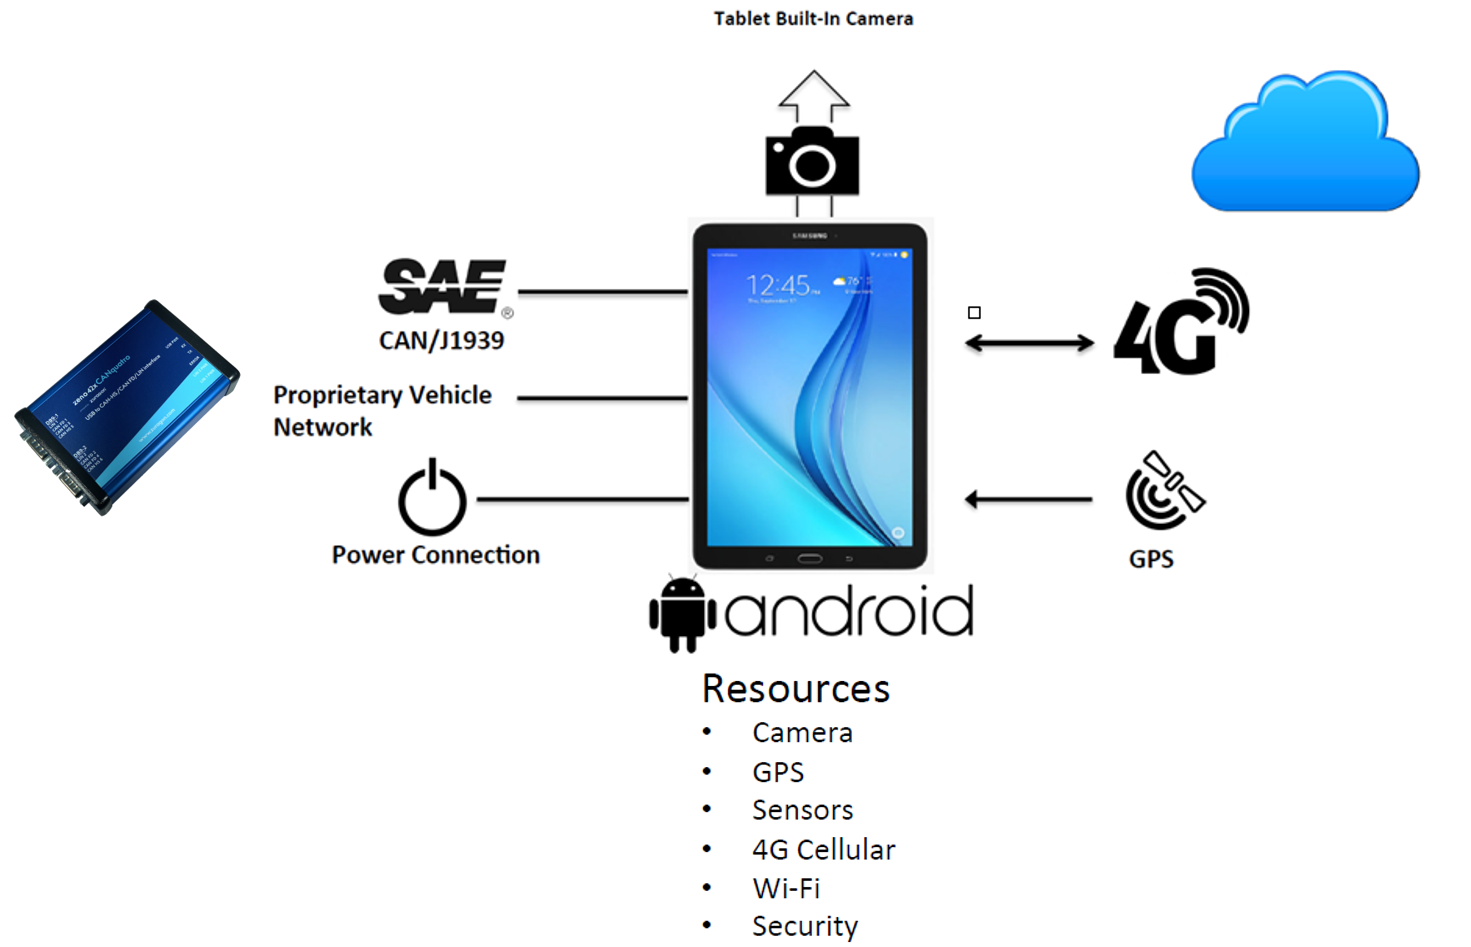
ViCANdroid only works with Kvaser hardware at the moment. The support for Zeno 42x CANquatro will come soon.
The Kvaser hardware and CANquatro carry the license for ViCANdroid app.
It is a supplementary product of ViCANdo.

Typically you will need to purchase below components from Zuragon or our distributors in your country:
- 1 x Vicandroid app license
- 1 x USB-CAN interface: Zeno 42x CANquatro and cables
- 1 x Dsub9 to OBD II adapter cable, 2.5 meter
- (optional) 1 x OBD II extension cable, 2.5 meter
- 1 x Vicando desktop base license + Telemetics license option
You will need to prepare below products by yourself:
- 1 x Android device with camera and USB-type C host port
- 1 x OTG cable
- 1 x vehicle to test
- 1 x Android device mounting device
- 1 x computer to run Vicando
Note
It is also possible to have Android device working as a hotspot and configure the Kvaser Blackbird v2( CAN-WiFi adapter) to connect to the same network and receiving CAN traffic wirelessly.
6.1 ViCANdroid as remote logger
To use ViCANdroid as a remote logger, you need to follow below precedure. Download and install ViCANdroid to your Android device first.
Plugin the CANquatro or Kvaser hardware with license for ViCANdroid app over USB host port on Android device, allow all access to the ViCANdroid app.
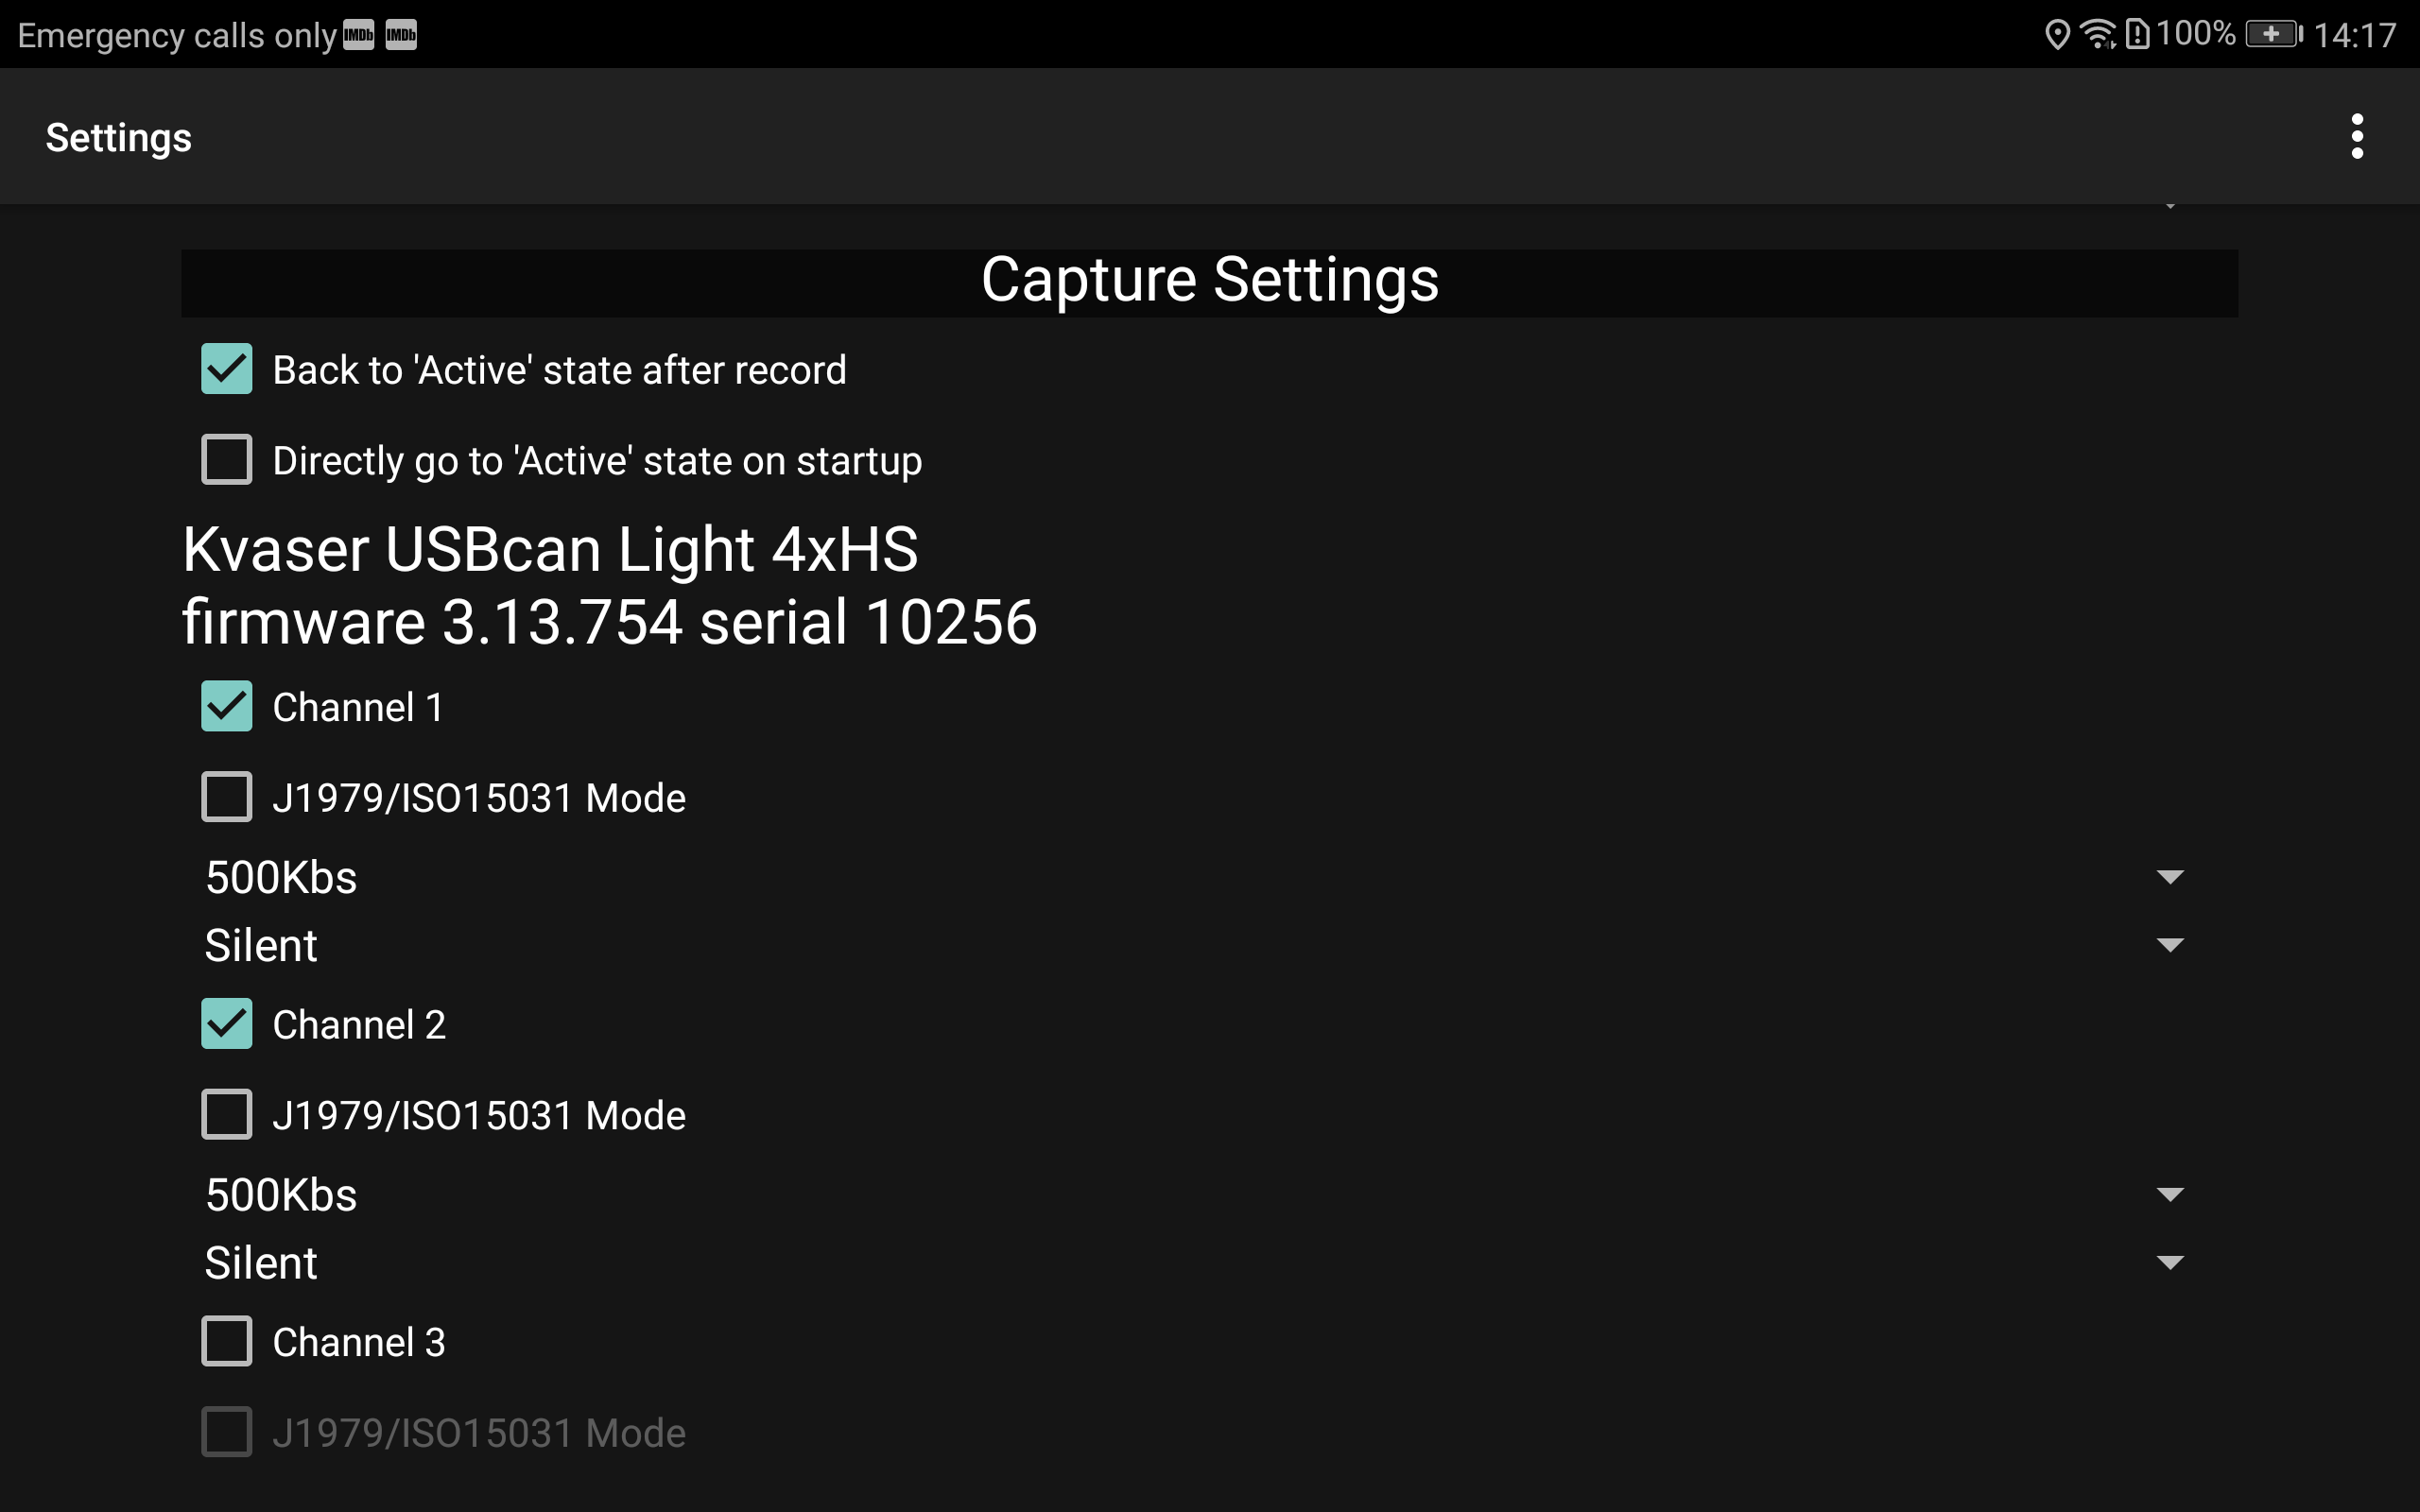
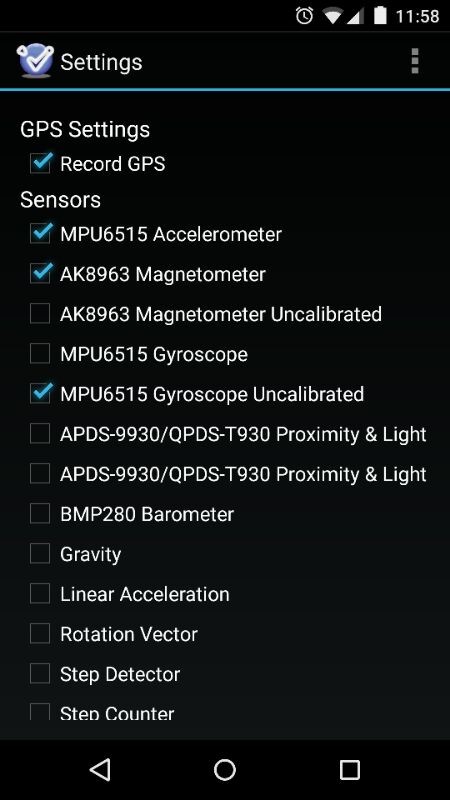
Click on the menu to open the settings and configure the CAN channels to use:
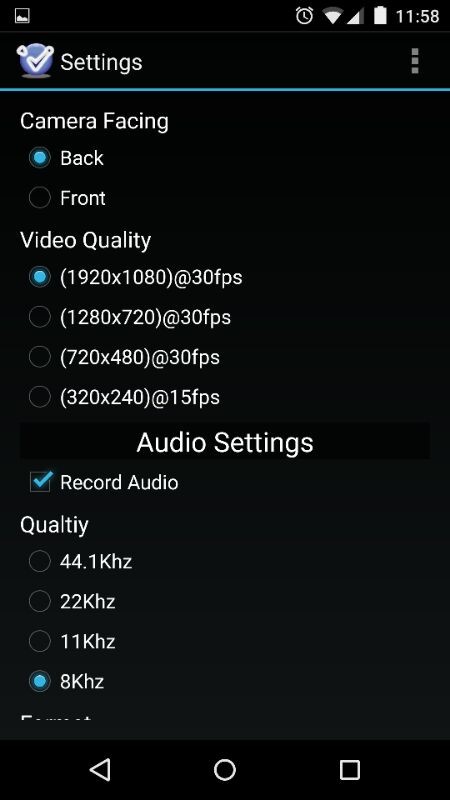
Select the resources that you want as a part of the measurement. Please note that every Android device has its own set of sensors that may vary from one model to another.
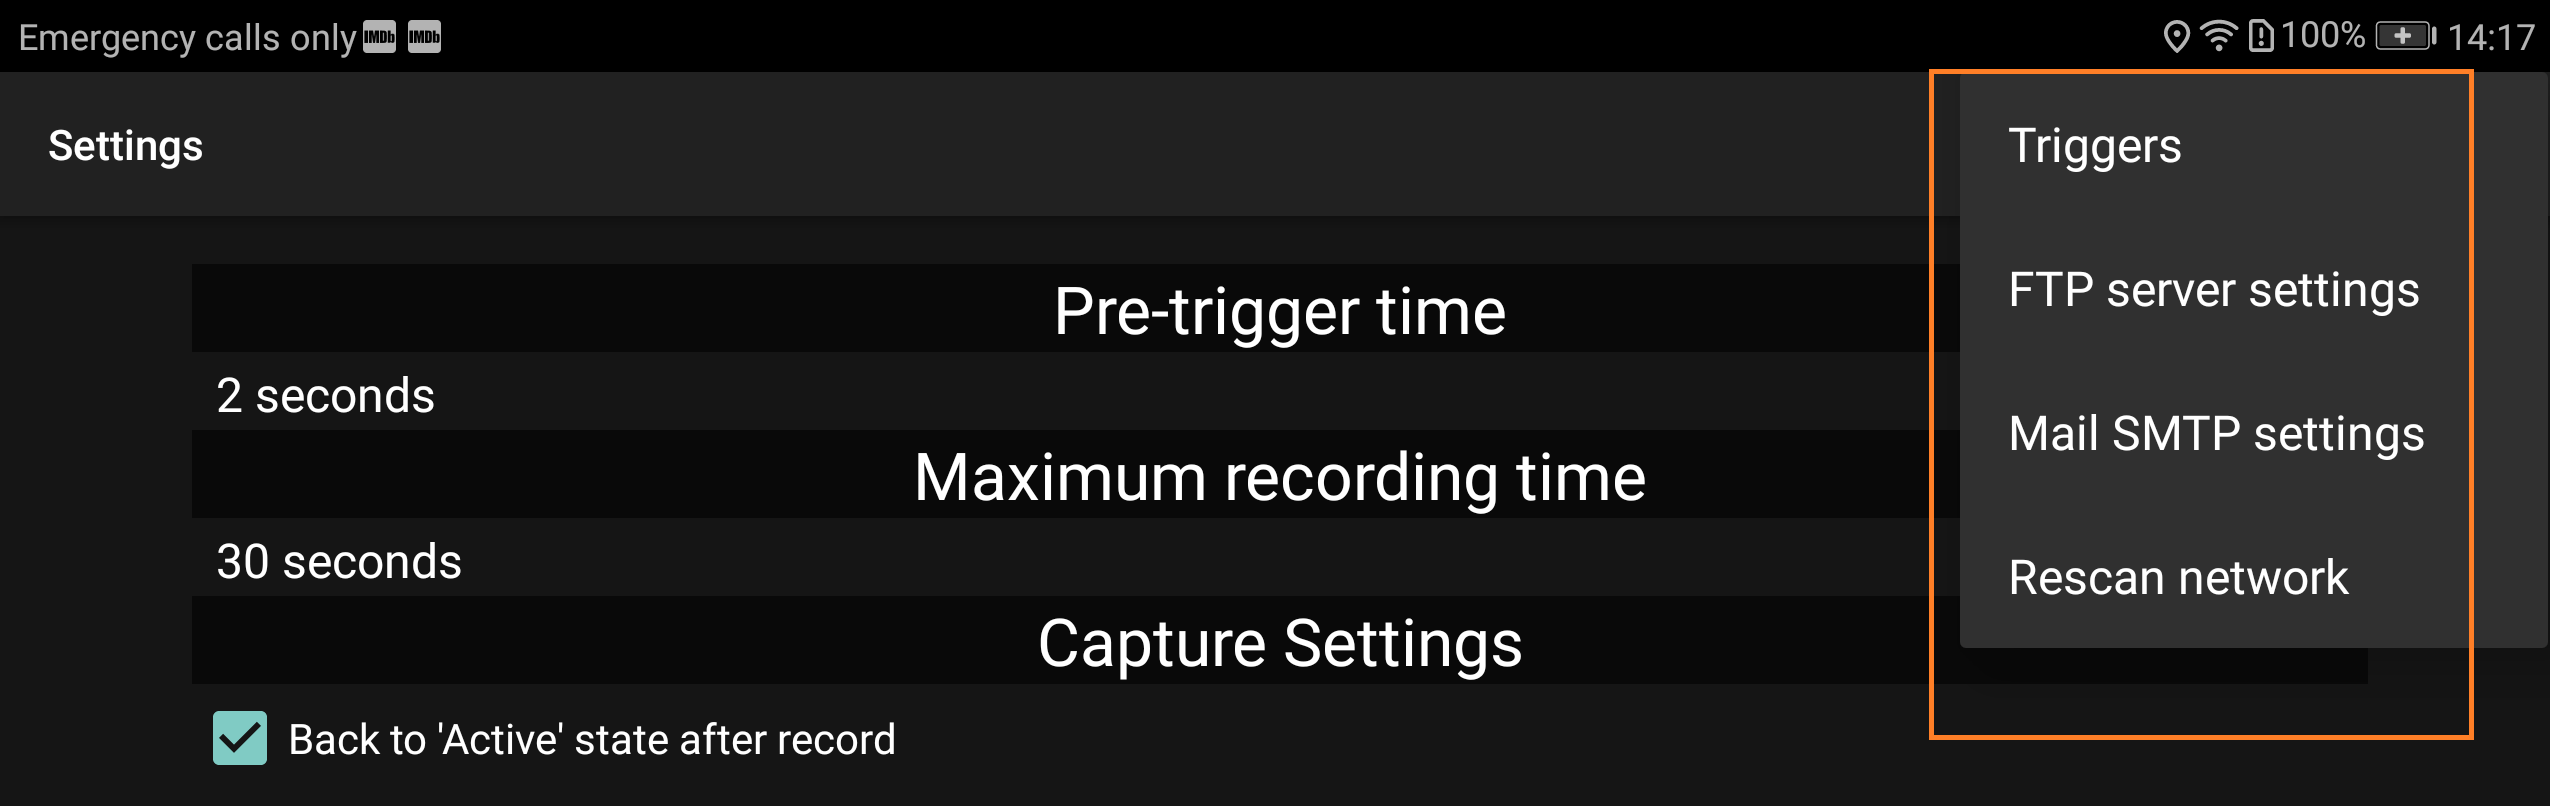
Click on the menu on the settings view, you will have access to other configuration windows for Triggers, FTP server as well Mail SMTP settings:
Then go back to the main view and start activate and recording.
Whenever a session is recorded it will show up under recorded sessions menu and can be seen as shown below.
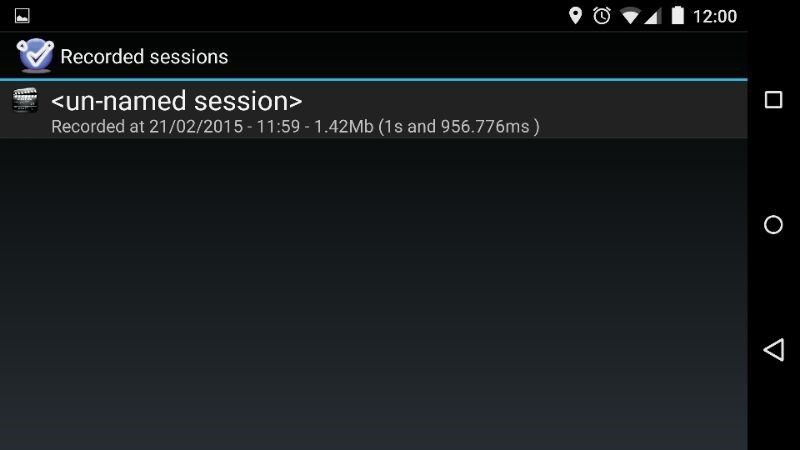
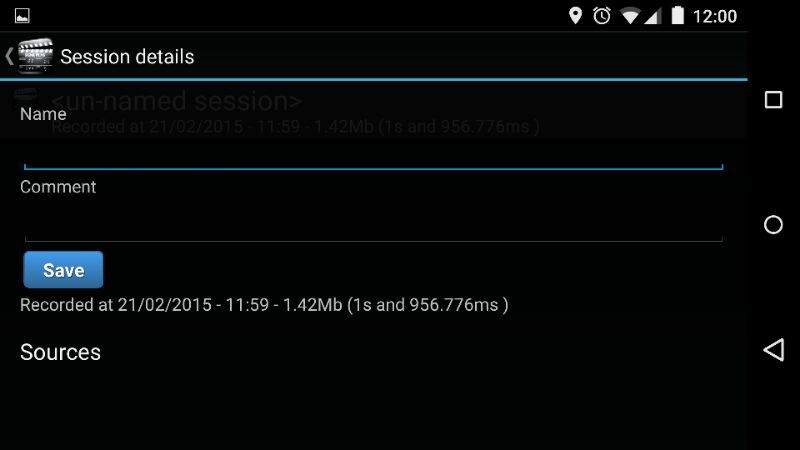
It is possible to name the sessions under the session details menu.
6.1.1 Upload ViCANdroid logs to FTP server
Incase you want to transfer the log file from ViCANdroid to ViCANdo there are various available options. One of the ways is to set up ViCANdroid in order to automatically transfer the log files to an FTP server. This can be done in the FTP settings menu.
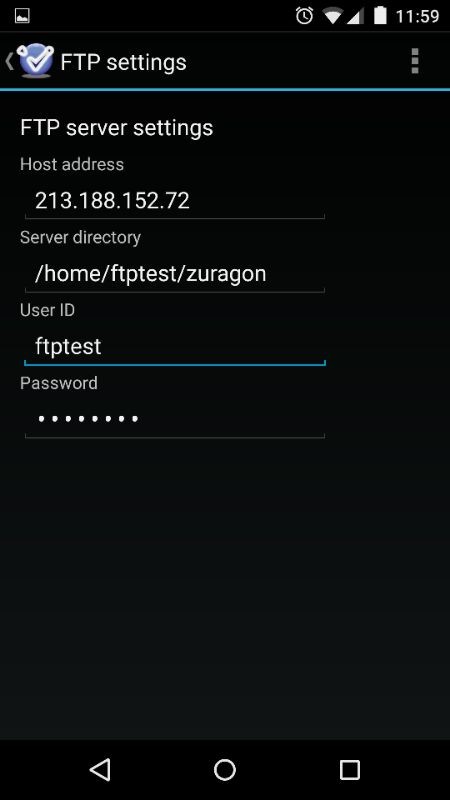
It is also possible to get a notification by e-mail or SMS, when a ViCANdroid has triggered on an event. To set up such notifications one has to input the mail settings into the FTP settings tab.

6.1.2 Download ViCANdroid logs to ViCANdo via the same network
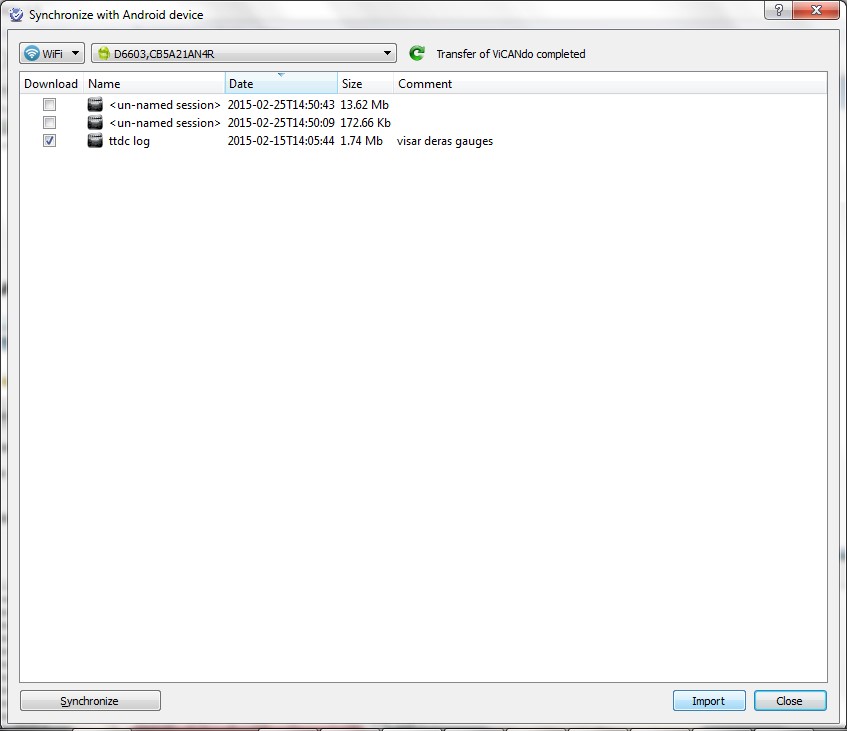
One way to pull out the log files from ViCANdroid is by connecting the Android device and your computer to the same network. ViCANdo will be able to find the device by right clicking on ‘All sessions’ and then, ‘Synchronize with Android device’.
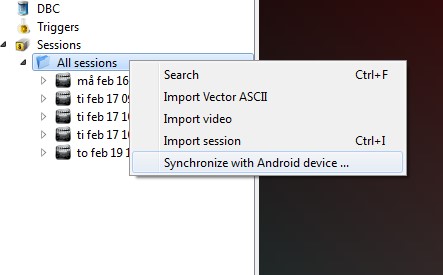
On doing so, the following dialogue box will open.
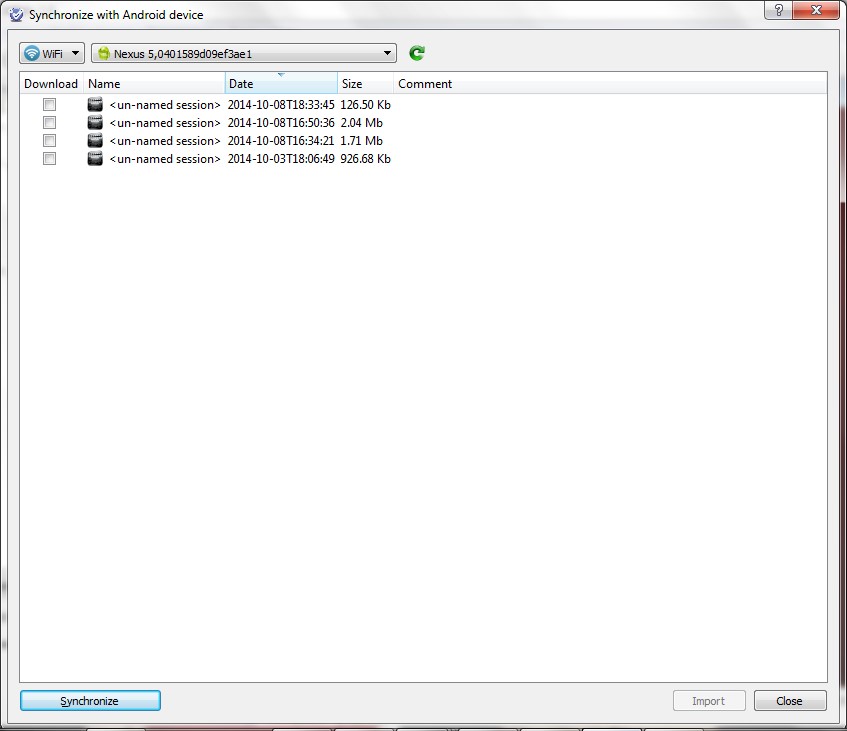
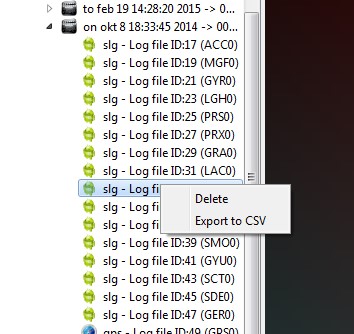
In this dialogue box, it is possible to choose which log files to import to ViCANdo and by selecting the Import option, these log files will then be transferred to the project catalogue of ViCANdo.
6.1.3 Download ViCANdroid logs to ViCANdo from FTP server
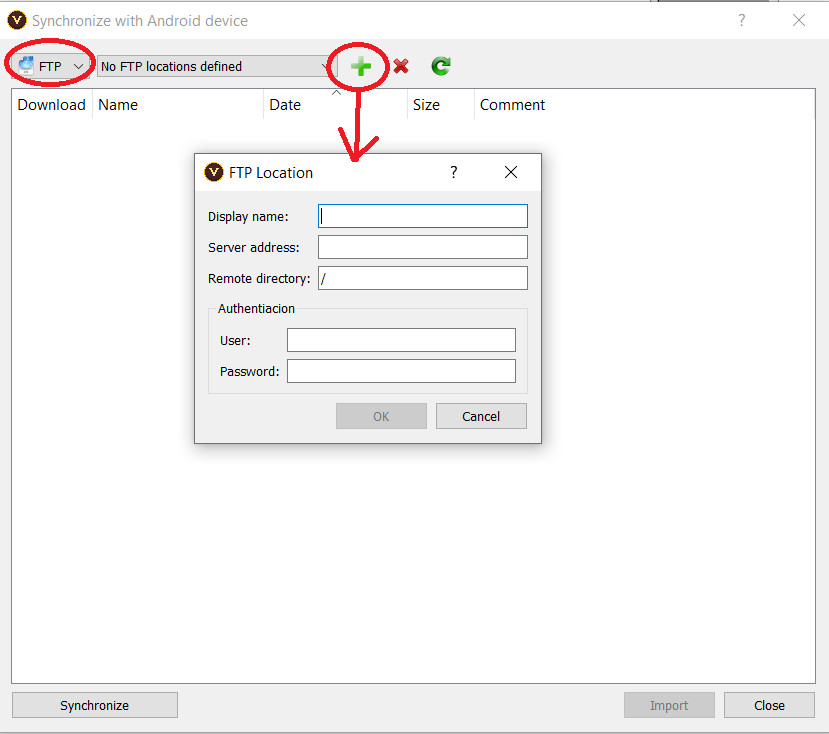
It is also possible for ViCANdo to download the logs recorded by ViCANdroid app from the FTP server if the ViCANdroid is configured to upload the logs to the FTP server.
Then you need to select FTP in the drop-down box instead of WiFi:
Then select the sessions you want to download to your computer for post analysising and click Import button to import.
When the sessions recorded by ViCANdroid are downloaded to the ViCANdo, the new Sources coming from the Android device will show up in the project just like any other source and from this point onwards, it is possible to deal with them in a similar way as with a signal from any other source inside ViCANdo.
It is also possible to export the log files created by the Android device in CSV format incase you would like to carry out any kind of post analysis using a tool other than ViCANdo.
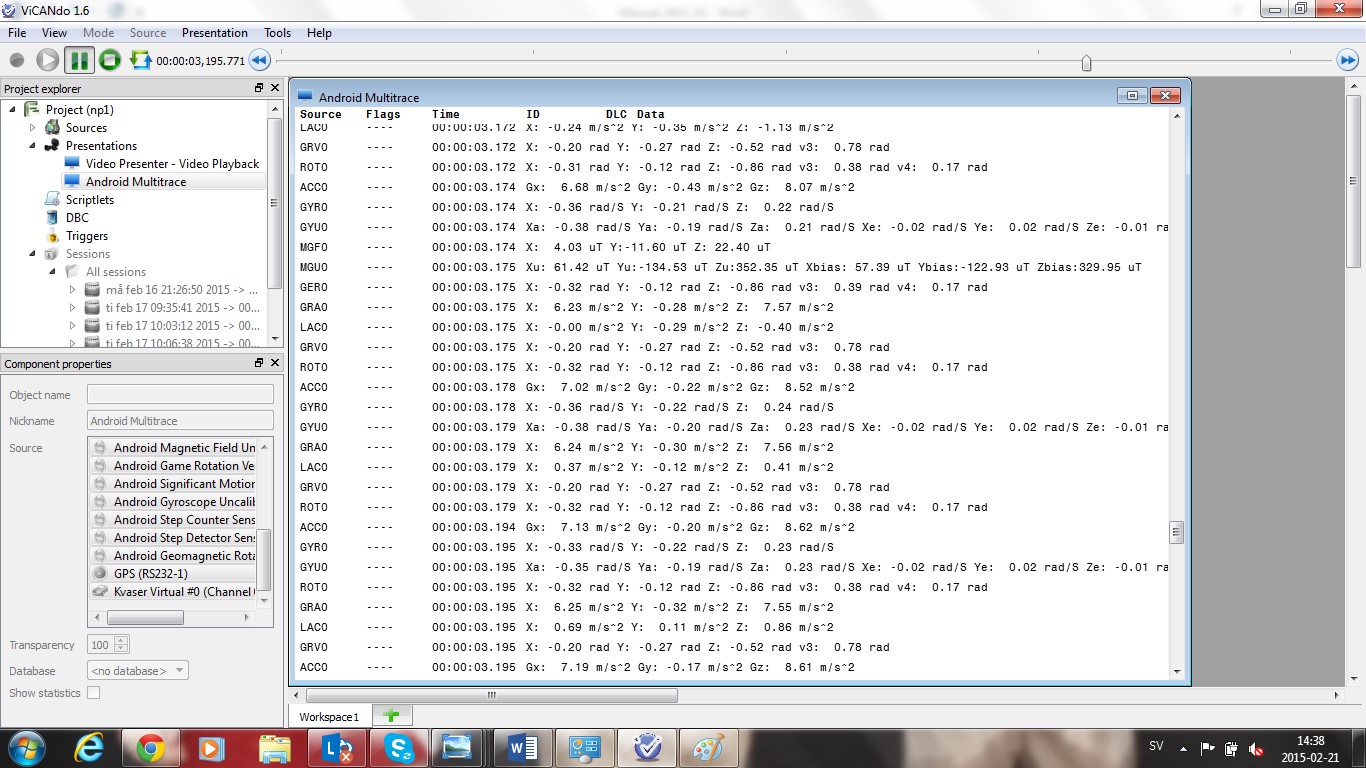
The signals created by android in a Multi trace window where they are time stamped and the measured data is shown with its correct units are as shown below.
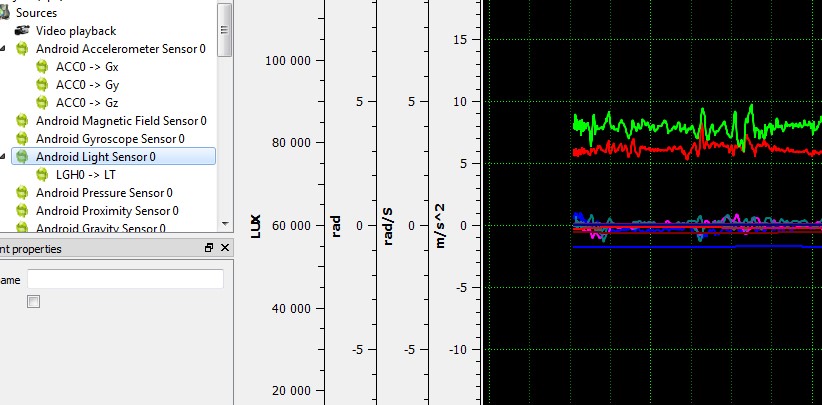
It is also possible to plot the signals in a Graph Window.
6.1.4 Syncronize triggers from ViCANdo to ViCANdroid
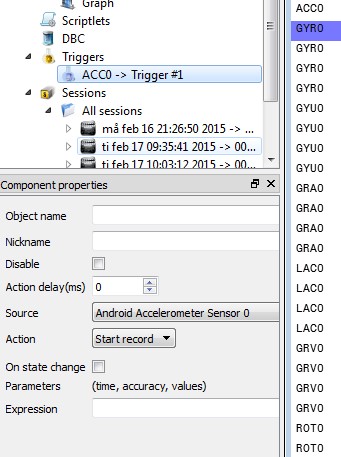
If you want to create triggers for ViCANdroid, the trigger needs to be created in ViCANdo first.
Only standard mode triggers with simple and one condition is supported in ViCANdroid. You can set multiple simple triggers in the ViCANdo project and syncronize them to the ViCANdroid app.
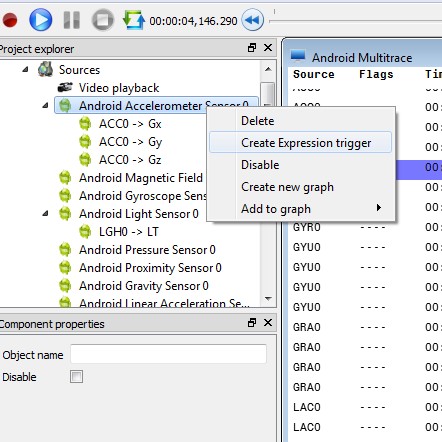
The logic for this is the same and is independent of the signal type and the trigger conditions are created in the component properties of the trigger.
When the triggers work well in ViCANdo, they can be transferred to an Android device by choosing the Synchronize with Android device option in the All Sessions menu.
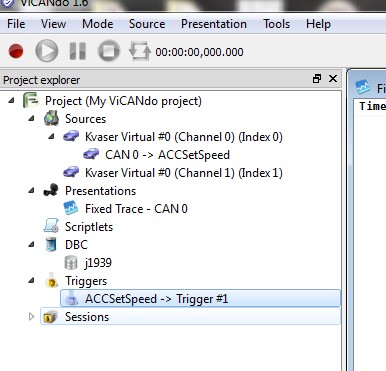
Next, click the Synchronize button in the menu that pops up.
Now, the trigger will be visible and active to use in ViCANdroid.
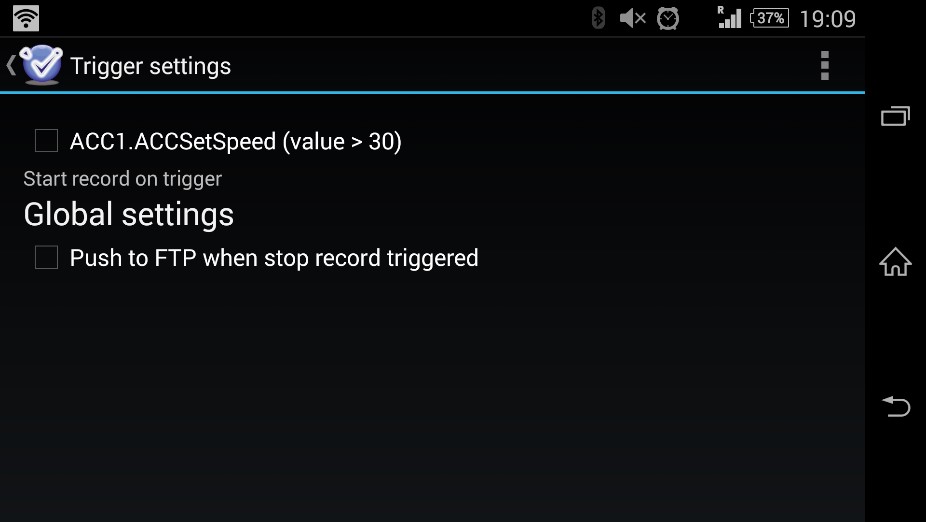
If you have multiple CAN channels, you can configure the triggers on which channel, for example:
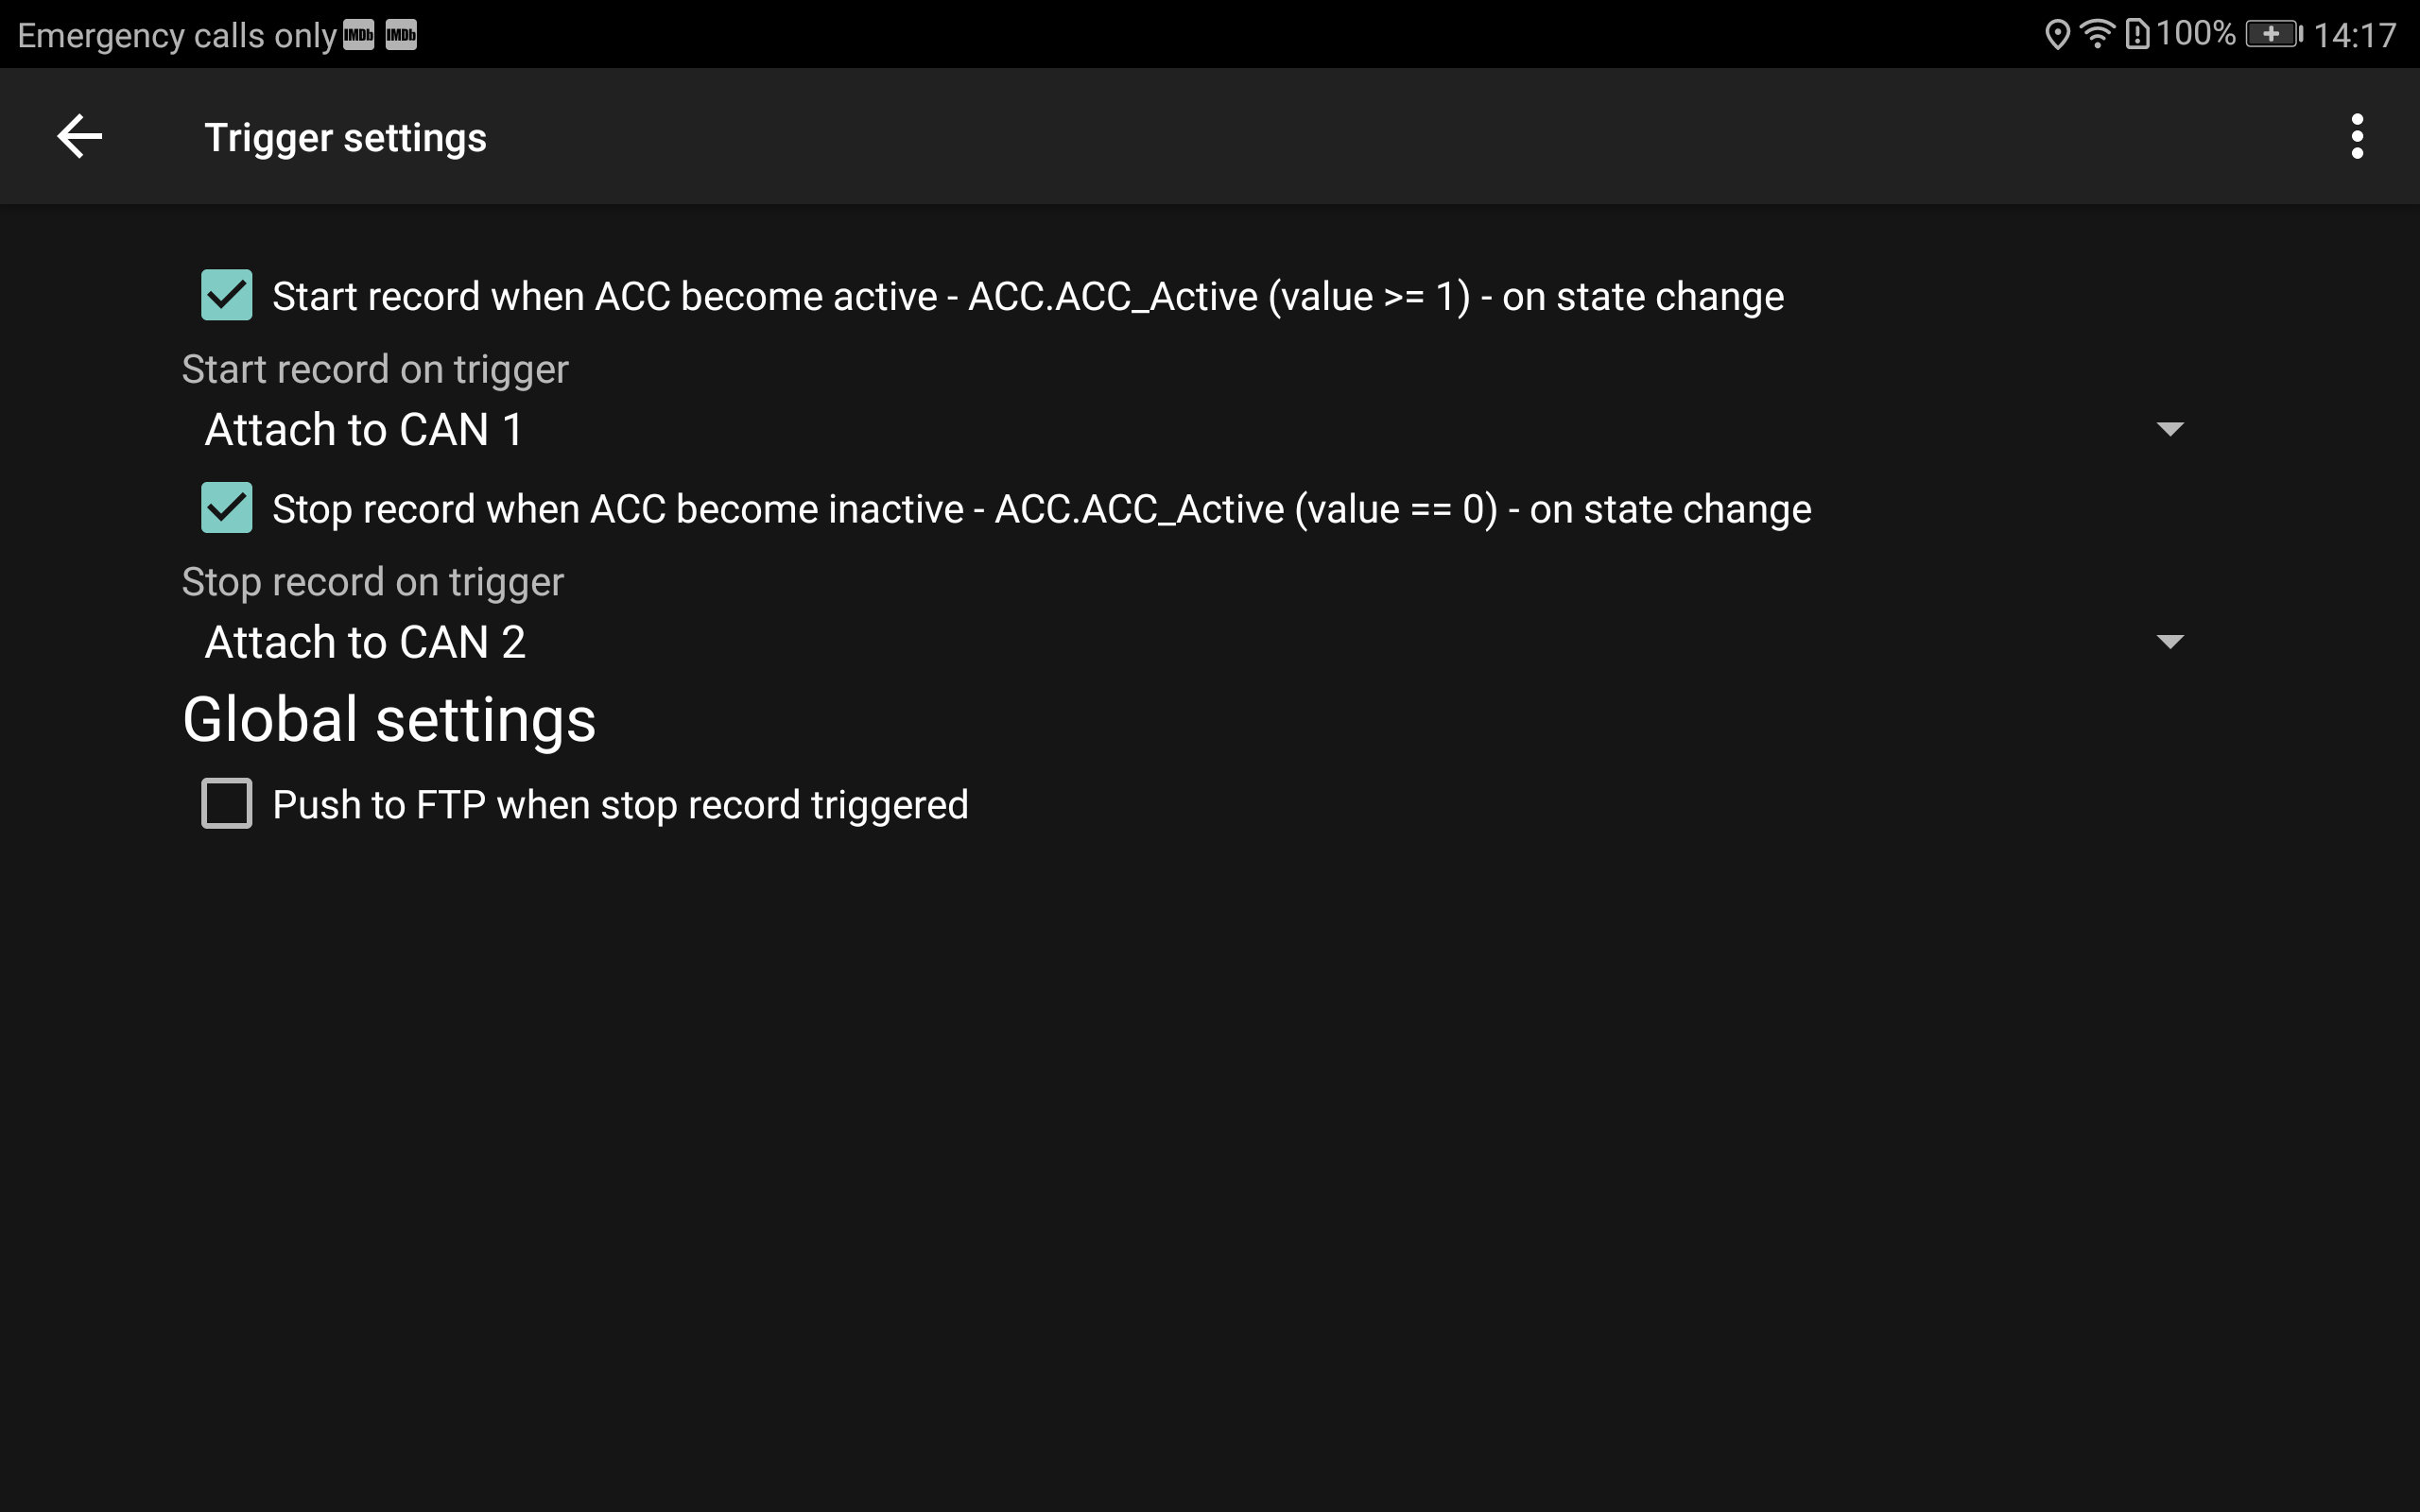
From this point on, if trigger on start recording, you can add the project-level pre-trigger time as shown below.
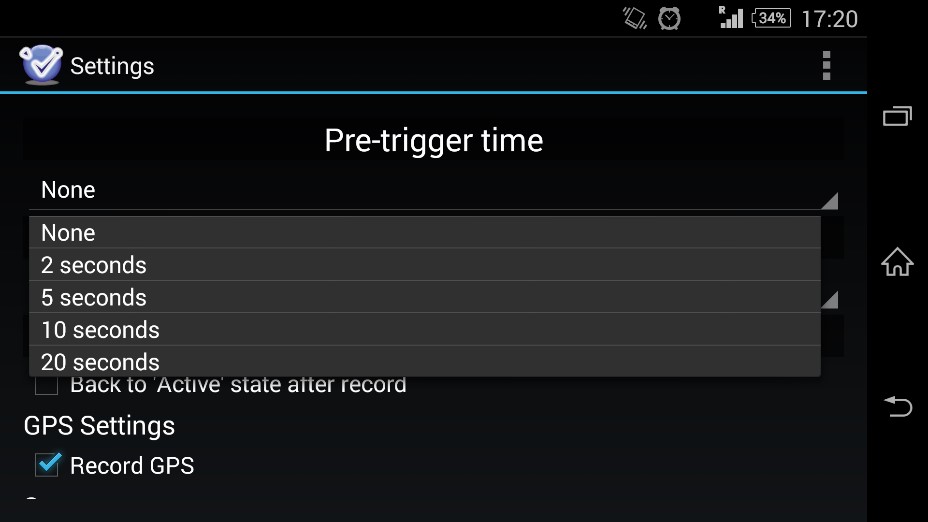
The pre-trigger time is the one that is similar to the pre-trigger time property of the project inside ViCANdo software.
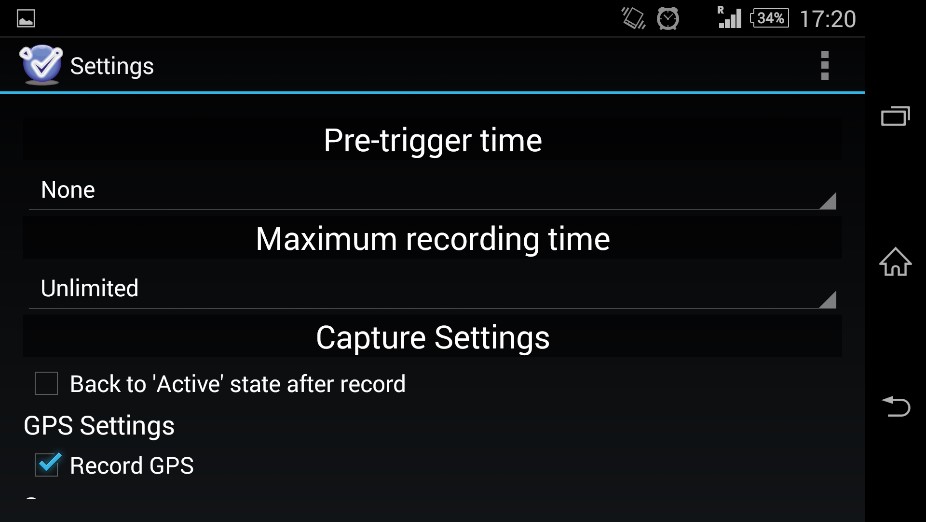
If you want to limit the length of each session, you can configure the maximum recording time here:
6.2 Option J1979 scanner
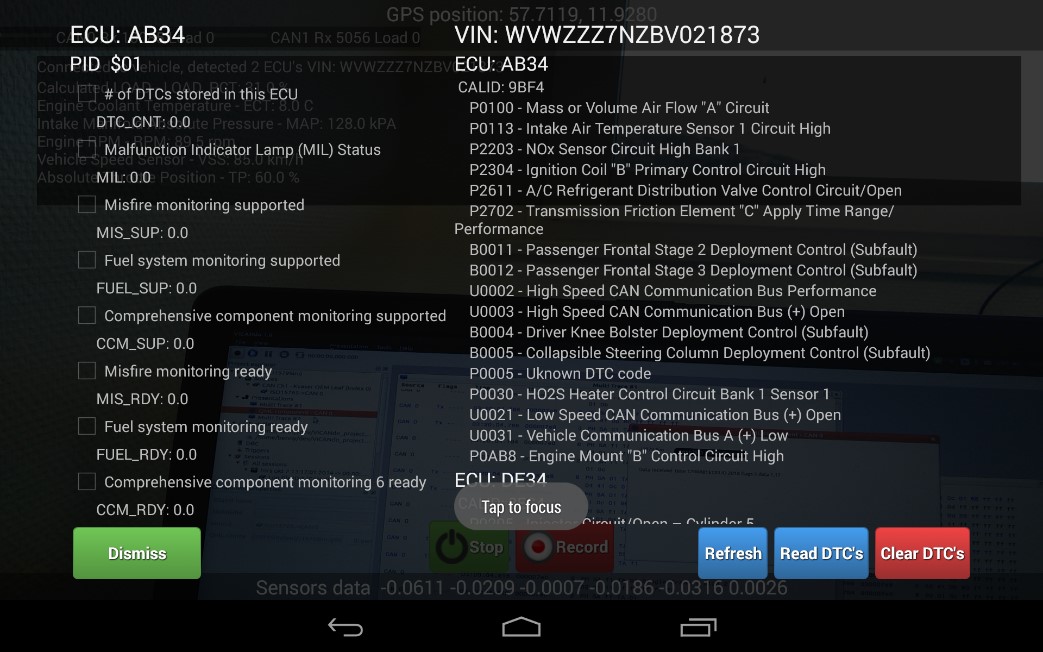
The ViCANdroid option J1979 covers the standard for read out of diagnostic data and error codes available in most modern vehicles. The option when purchased is activated when you connect the CAN cable over USB or wirelessly.
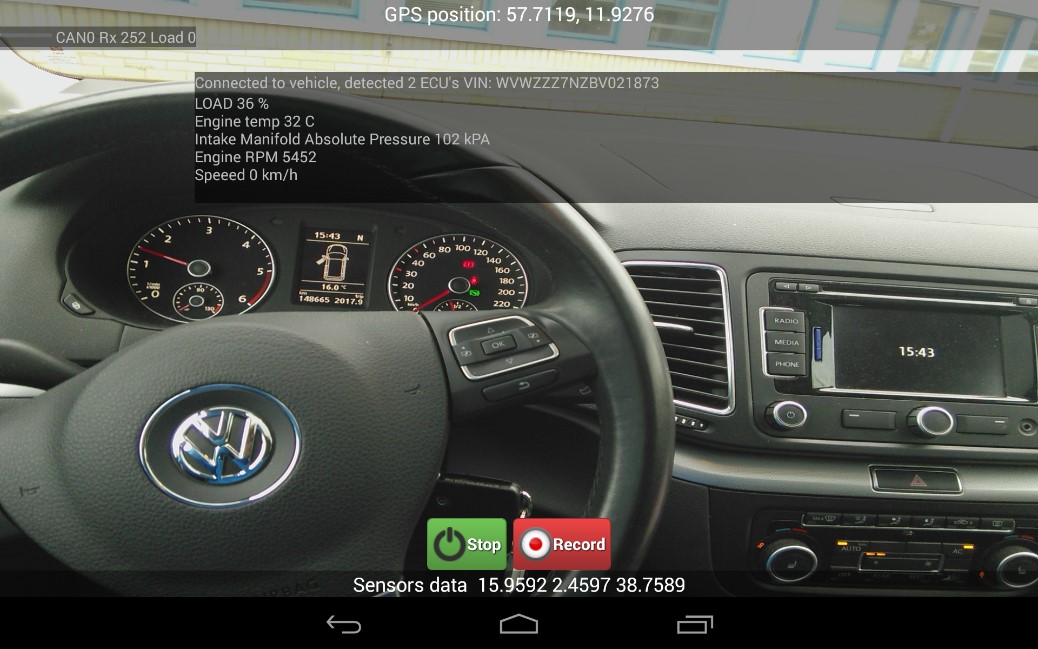
The option automatically reads out important data such as VIN number and status of the electronic units once connected to a vehicle. DTCs can be followed on a single service level or as per ECU and it is possible to read and clear DTCs using dedicated buttons.
The J1979 diagnostic data can also be used as triggers to start and stop a recording by utilizing the same work flow as described earlier in the manual.
This concludes the basics of ViCANdroid.
Watch below demo video to learn how to record data using Vicandroid and import the data to Vicando:
ViCANdroid can also be adapted to other situations so incase you have any further queries, please contact your local Zuragon representative for advice.